How To Set Up A Home Art Studio
Creating art is one of the most rewarding and therapeutic activities you can do. Whether you’re a professional artist, a hobbyist, or someone who’s just starting out, having a dedicated home art studio can make a huge difference in your creativity, productivity, and overall enjoyment of the process.
A home art studio is more than just a space to paint or draw—it’s a sanctuary where you can focus, experiment, and let your imagination flow freely. The good news? You don’t need a huge room or a fancy setup to create your perfect studio. With some planning, organization, and inspiration, you can transform any corner of your home into a functional and inspiring creative space.
In this guide, we’ll walk you through everything you need to know to set up a home art studio, including:
-
Choosing the right space
-
Organizing your supplies
-
Setting up your workspace for comfort and productivity
-
Lighting, storage, and ventilation tips
-
Decorating your studio to inspire creativity
-
Maintaining and evolving your art space over time
By the end, you’ll have a roadmap to create a home studio that motivates you to create consistently and joyfully.
Why You Need a Home Art Studio
Before we get into the practical steps, let’s talk about why having a dedicated art space matters:
-
Focus and Productivity: Having a specific space for art reduces distractions and helps you focus on your creative work.
-
Organization: A dedicated space allows you to organize supplies efficiently, so you spend more time creating and less time hunting for materials.
-
Inspiration: Your studio can be designed to inspire you, filled with colors, textures, and personal touches that spark creativity.
-
Professionalism: Even if you’re not selling your art, having a studio helps you treat your creative work with the respect it deserves.
-
Comfort: A well-designed workspace reduces strain on your body, helping you create for longer periods without discomfort.
Step 1: Choose the Right Space
The first step in setting up your home art studio is selecting the best space in your home. You don’t need a huge room—many artists work in small corners, spare bedrooms, or even converted closets.
Consider These Factors:
-
Natural Light: If possible, choose a space with plenty of natural light. Sunlight is ideal for color accuracy and creates an uplifting atmosphere.
-
Ventilation: Especially if you work with paints, inks, or other chemicals, good ventilation is crucial. Open windows, use fans, or even a small air purifier.
-
Noise Level: Consider whether you want a quiet, meditative space or if background music and household sounds are fine.
-
Accessibility: Your studio should be easy to access, so you’re more likely to use it regularly.
-
Space for Growth: Think about future projects—will you need more table space, storage, or room for large canvases?
Pro Tip: Even a small desk by a window can serve as a mini studio. It’s not about the size—it’s about creating a dedicated space where you can focus and feel inspired.
Step 2: Organize Your Supplies
A cluttered workspace can stifle creativity, while an organized studio makes it easy to find materials and jump right into projects.
Essential Art Supplies:
Depending on your medium, your supplies will vary, but here’s a general list for a versatile home studio:
-
Drawing Supplies: Pencils, charcoal, colored pencils, pens, erasers
-
Painting Supplies: Acrylics, watercolors, oils, brushes, palette knives, palette
-
Canvas & Paper: Canvases, sketchpads, watercolor paper, drawing paper
-
Storage Containers: Bins, drawers, jars for brushes and tools
-
Easels: Tabletop or full-size easels depending on your space
-
Mixing Palette: For paints, especially acrylics or oils
-
Protective Gear: Aprons, gloves, or drop cloths for messy projects
Tips for Organizing Supplies:
-
Vertical Storage: Use wall shelves, pegboards, or hanging racks to free up floor space.
-
Clear Containers: Store small items like beads, erasers, or paint tubes in clear bins so you can see everything at a glance.
-
Label Everything: Labels make it easier to find materials and put things away quickly.
-
Use Caddies: Portable caddies or trays let you move frequently used supplies easily from one workspace to another.
Pro Tip: Keep your most-used materials within arm’s reach, while seasonal or specialty supplies can be stored in higher cabinets or boxes.
Step 3: Set Up Your Workspace
Your workspace is the core of your home art studio. It should be functional, comfortable, and inspiring.
Choosing the Right Surface:
-
Desk or Table: A sturdy, flat surface is essential for drawing or painting. Consider adjustable tables if you want flexibility for sitting or standing.
-
Work Mat or Protective Surface: Protect your table from spills, scratches, or stains.
-
Adjustable Easel: If you paint on canvas, an adjustable easel is invaluable. It allows you to work at different angles comfortably.
Seating and Comfort:
-
Chair: Choose a comfortable chair with good back support. Art sessions can last hours, so comfort is key.
-
Standing Option: Some artists prefer standing for certain projects. Consider a tall table or adjustable standing desk.
Lighting:
Lighting can make or break your art studio.
-
Natural Light: Place your workspace near a window for daylight. North-facing windows are ideal for consistent light without harsh shadows.
-
Task Lighting: Adjustable desk lamps or LED lights provide focused illumination, especially for detailed work.
-
Warm vs. Cool Lighting: Daylight LEDs mimic natural light and are great for color accuracy.
Step 4: Decorate Your Studio for Inspiration
A studio should feel inviting and inspiring. Personal touches make it a space where creativity flows effortlessly.
Ideas for Studio Decoration:
-
Mood Board: Pin photos, color swatches, and inspirational images to a corkboard or wall space.
-
Color Scheme: Choose colors that energize you or make you feel calm—whatever aligns with your creative vibe.
-
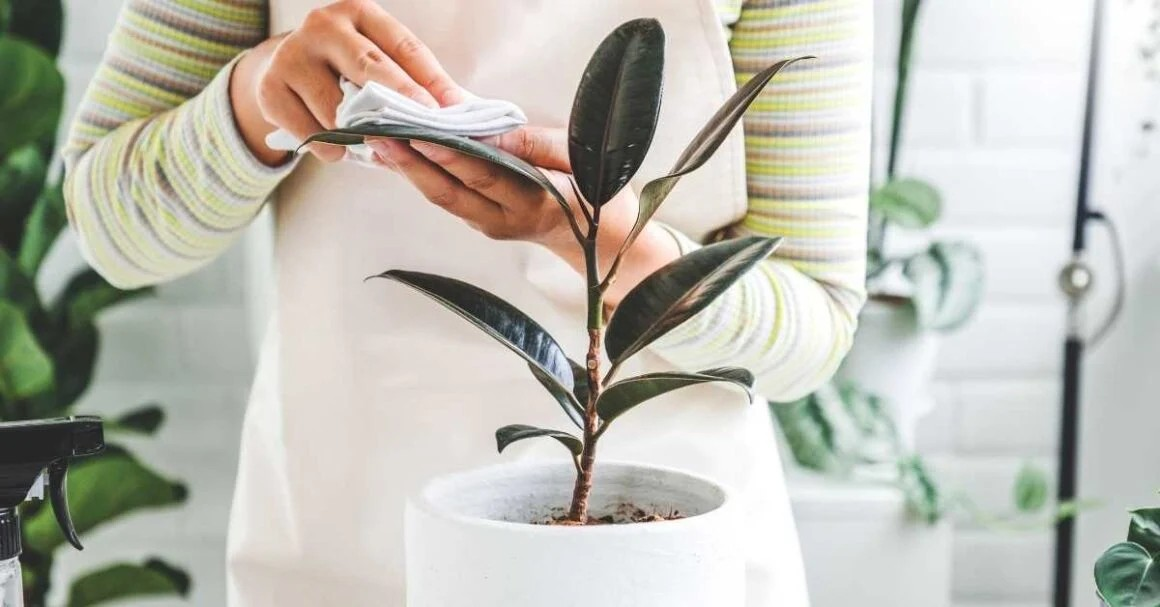
Plants: Greenery adds life and freshness to your workspace. Small potted plants or hanging greenery can make a huge difference.
-
Display Art: Show your previous work to remind yourself of your achievements and inspire future projects.
-
Music and Ambiance: A speaker for music, a candle, or soft lighting can make your studio feel cozy and welcoming.
Step 5: Storage Solutions for a Clutter-Free Studio
A clean and organized studio improves creativity and efficiency.
-
Shelving Units: Use vertical space for paints, books, and supplies.
-
Drawer Organizers: Perfect for small tools like pencils, brushes, or pastels.
-
Rolling Carts: Ideal for supplies you want to move around easily.
-
Bins and Baskets: Store leftover materials, fabric, or paper neatly.
-
Label Everything: Clear labels help you find what you need without searching.
Pro Tip: Rotate supplies seasonally or by project. Store infrequently used items in boxes to maintain a clutter-free workspace.
Step 6: Create Zones in Your Studio
If space allows, divide your studio into functional zones.
-
Painting Zone: Easel, paints, palette, and brushes
-
Drawing Zone: Desk or table with pencils, pens, and sketchbooks
-
Storage Zone: Shelves, bins, and supply organizers
-
Inspiration Zone: Mood boards, reference books, and displayed artwork
Zones help you stay organized and make it easier to transition between projects.
Step 7: Tools for Digital Artists
If you’re into digital art, your studio setup will need additional elements:
-
Tablet or Graphics Tablet: For drawing, painting, or digital design
-
Computer or Laptop: Powerful enough to handle design software
-
Stylus and Pen: High-quality stylus improves precision
-
Monitor Setup: A second screen can help with references or multitasking
-
Software: Photoshop, Procreate, Illustrator, or other digital tools
Even digital artists benefit from organized spaces and inspiration boards, so consider a hybrid setup.
Step 8: Make Your Studio Comfortable and Ergonomic
Comfort is key to long creative sessions:
-
Adjustable Chair and Desk: Prevents back and neck strain
-
Proper Lighting: Reduces eye strain
-
Temperature Control: Ensure the room is well-ventilated and at a comfortable temperature
-
Footrest: Optional, but can improve posture if sitting for long periods
Step 9: Maintain and Evolve Your Studio
Your home art studio should evolve with you:
-
Declutter Regularly: Every month, remove supplies you no longer use.
-
Rotate Inspiration: Update mood boards, display new art, or add seasonal decor.
-
Experiment: Don’t be afraid to rearrange furniture or tools for better workflow.
-
Reflect: Notice what’s working and what could improve. Your studio should adapt to your creative process.
Step 10: Tips to Boost Creativity in Your Studio
-
Keep a Sketchbook Nearby: Capture ideas instantly.
-
Experiment with Materials: Try new paints, mediums, or surfaces.
-
Limit Distractions: Keep your phone and TV away unless used for inspiration.
-
Set Goals: Daily or weekly art goals help maintain momentum.
-
Invite Others: Host occasional art sessions or workshops to learn from peers.
Setting up a home art studio is more than just organizing supplies—it’s about creating a space that supports your creativity, inspires you, and makes art-making enjoyable. By choosing the right space, organizing supplies, optimizing lighting and comfort, and decorating with inspiration, you can create a home studio that motivates you to create consistently.
Remember, your art studio should grow with you. As your skills and interests evolve, your space can adapt to accommodate new tools, mediums, and techniques. The most important thing is that your studio is a place where you feel at home, focused, and inspired.
So grab a jar of brushes, a stack of paper, or your favorite paints, and start designing your perfect home art studio today. Your creativity—and your future self—will thank you.
How To Set Up a Home Art Studio
Whether you’re just starting your artistic journey or you’ve been creating for years, having a dedicated home art studio is a game-changer. It’s a space where you can focus, experiment, and let your imagination run wild without interruption. In this expanded guide, we’ll explore everything you need to know about designing, organizing, and evolving a home art studio that inspires creativity every day.
From choosing the perfect space to creating workflow-friendly zones, from small-space hacks to professional tips, this guide is your complete roadmap to building a home studio that works for your unique creative process.
Why a Home Art Studio Matters
Before we get into the nuts and bolts, let’s reflect on why a home art studio is worth the investment:
-
A Space to Focus: Having a dedicated studio creates a mental boundary between “art time” and “everything else.”
-
Boosts Productivity: When all your tools are organized and ready, you spend less time hunting for supplies and more time creating.
-
Inspiration On Demand: Your studio can be filled with colors, textures, and objects that spark new ideas.
-
Improves Workflow: Thoughtful layout and storage choices make it easier to jump between projects.
-
Encourages Consistency: A ready-to-go space makes it easier to build a daily or weekly creative habit.
Even a small corner of your home can become a powerful creative sanctuary.
Step 1: Choosing the Right Space
The first step in setting up your home art studio is selecting the best space in your home. Size doesn’t matter as much as usability and comfort.
Factors to Consider
-
Lighting: Natural light is ideal, but if that’s not available, make sure you have adjustable, bright task lighting.
-
Ventilation: Essential if you use paints, inks, or clay. Open windows or add a fan.
-
Noise: Decide if you want a quiet, meditative environment or if background music is okay.
-
Accessibility: The studio should be easy to get to, so you’re more likely to use it.
-
Expansion Potential: Consider future growth for larger projects or more supplies.
Small Space Solutions:
Even if you don’t have a spare room, you can still create an inspiring studio:
-
Use a foldable desk in a corner of your bedroom.
-
Convert a closet into a “cloffice” style art nook.
-
Utilize vertical storage to free up floor space.
-
Choose multi-functional furniture, like a table that doubles as storage.
Pro Tip: North-facing windows provide consistent daylight without harsh glare—perfect for color-sensitive work.
Step 2: Organizing Your Supplies
A cluttered studio can kill creativity, while an organized space makes it easy to start creating without distraction.
Essential Supplies for All Artists
Depending on your medium, your supplies will vary, but here’s a general list:
-
Drawing Materials: Pencils, charcoal, pens, erasers, pastels
-
Painting Materials: Acrylics, oils, watercolors, brushes, palette knives
-
Canvas & Paper: Sketchbooks, drawing paper, watercolor paper, canvas panels
-
Tools & Accessories: Rulers, scissors, tape, palette, masking fluid
-
Protective Gear: Aprons, gloves, drop cloths
-
Storage: Bins, jars, drawers, rolling carts
Organizing Tips
-
Use Vertical Space: Wall shelves, pegboards, and hanging racks are perfect for freeing up floor space.
-
Clear Containers: Clear bins let you see your supplies at a glance.
-
Label Everything: Labels save time and reduce frustration when searching for materials.
-
Caddies: Portable caddies allow you to move your most-used supplies easily.
Pro Tip: Keep frequently used materials within arm’s reach. Store seasonal or specialty supplies in higher cabinets or boxes.
Step 3: Designing Your Workspace
Your workspace is the heart of your studio. Comfort, ergonomics, and workflow efficiency are key.
Work Surfaces
-
Table or Desk: Choose a sturdy, flat surface. Adjustable tables are ideal for sitting or standing.
-
Easel: A tabletop or full-size easel is essential for canvas work.
-
Protective Surface: Use a mat or drop cloth to protect your table from paint, glue, or other messy materials.
Seating
-
Comfortable Chair: A chair with good back support prevents strain during long sessions.
-
Standing Option: Standing can be ideal for large projects or long painting sessions. Adjustable tables make this easy.
Lighting
-
Natural Light: Place your workspace near a window for daylight.
-
Task Lighting: Adjustable LED desk lamps provide focused light for detailed work.
-
Light Quality: Daylight LED bulbs give accurate color representation, essential for painting and design.
Step 4: Decorating Your Studio
Your studio should inspire creativity. Personal touches make it a place where you actually want to spend time.
Decoration Ideas
-
Mood Board: Pin images, color swatches, quotes, or sketches to a corkboard.
-
Display Art: Showcase your work to motivate yourself and track progress.
-
Plants: Add small potted plants or hanging greenery for a touch of nature.
-
Lighting Ambiance: String lights, candles, or lamps can make the space cozy.
-
Music & Sound: A speaker for music or a white-noise machine can improve focus.
Pro Tip: Include objects or textures that spark your imagination—fabric scraps, found objects, or color palettes.
Step 5: Storage Solutions
A clutter-free studio boosts creativity. Storage should be functional, flexible, and accessible.
-
Shelving Units: Use for paints, books, and supplies.
-
Drawer Organizers: Ideal for small tools like pencils, erasers, and brushes.
-
Rolling Carts: Perfect for supplies you want to move around.
-
Bins & Baskets: Great for fabric, paper, or oversized materials.
-
Label Everything: Make it easy to find what you need.
Pro Tip: Rotate supplies seasonally or by project to keep the workspace organized and fresh.
Step 6: Create Functional Zones
If your studio has enough space, divide it into functional zones:
-
Painting Zone: Easel, paints, brushes, palettes
-
Drawing Zone: Desk or table for pencils, pens, and sketchbooks
-
Storage Zone: Shelves, bins, and drawers for materials
-
Inspiration Zone: Mood boards, reference books, and displayed art
Zones make your workflow smoother and prevent clutter from spreading.
Step 7: Small-Space Studio Hacks
Not everyone has a large studio—here’s how to make the most of small spaces:
-
Foldable Desk: Use a wall-mounted fold-down table.
-
Multi-Functional Furniture: Storage ottomans or desks with drawers.
-
Vertical Pegboards: Hang brushes, scissors, and tools.
-
Portable Caddies: Move materials easily and store them away when done.
-
Stackable Bins: Keep supplies compact and organized.
Step 8: Digital Art Setup
Digital artists need a few additional tools:
-
Graphics Tablet or iPad: Essential for drawing digitally.
-
Computer: Strong enough to handle design software.
-
Stylus & Pen: High-quality stylus for precision.
-
Software: Photoshop, Procreate, Illustrator, or other creative programs.
-
Monitor Setup: Second screen for references or multitasking.
Even digital artists benefit from organized spaces, inspirational decor, and mood boards.
Step 9: Ergonomics and Comfort
Creating art can be physically demanding. Pay attention to comfort:
-
Chair & Desk: Adjust height for proper posture.
-
Lighting: Avoid eye strain with bright, even light.
-
Temperature: Maintain comfortable room temperature.
-
Footrest: Helps with posture during long seated sessions.
Step 10: Build a Workflow for Creativity
A functional studio encourages consistent creation.
-
Keep a Sketchbook Nearby: Capture ideas instantly.
-
Plan Projects: Sketch or outline your projects before starting.
-
Limit Distractions: Keep phones, TV, or unrelated items away.
-
Set Goals: Daily or weekly goals maintain momentum.
-
Experiment: Rotate mediums, try new techniques, or repurpose materials.
Step 11: Seasonal and Themed Studio Ideas
Keep your studio fresh by updating it seasonally:
-
Spring: Focus on growth, bright colors, and floral inspiration.
-
Summer: Use bold colors, vacation vibes, and outdoor scenes.
-
Fall: Warm colors, harvest themes, cozy elements.
-
Winter: Neutral or cool tones, cozy fabrics, and holiday inspiration.
Step 12: Learning from Professional Artists
Professional artists often follow these practices:
-
Dedicated Workspace: Even a corner in a small apartment becomes a professional studio.
-
Organization: Supplies are always accessible and labeled.
-
Inspiration: Artists surround themselves with reference books, art, and personal items.
-
Lighting: Many invest in daylight-balanced lamps.
-
Workflow: Zones for sketching, painting, and finishing help efficiency.
Step 13: Maintaining and Evolving Your Studio
Your studio should evolve with your practice:
-
Declutter Regularly: Remove unused materials.
-
Rotate Inspiration: Update mood boards and displays.
-
Rearrange: Try different layouts for better workflow.
-
Reflect: Notice what works and adjust for comfort and efficiency.
Step 14: Fun Additions for Creativity
-
Whiteboard or Chalkboard Wall: Sketch ideas or track projects.
-
Mini Library: Keep art books, magazines, and tutorials handy.
-
Reference Corner: Collect photos, objects, and textures for inspiration.
-
Project Table: A separate table for wet or messy work.
-
Photography Setup: Lightbox or backdrop for documenting finished pieces.
Final Thoughts
Setting up a home art studio is about more than furniture and supplies—it’s about creating an environment that nurtures creativity. By choosing the right space, organizing efficiently, optimizing lighting and ergonomics, and adding personal touches, your studio can become a sanctuary of inspiration and productivity.
Remember: it doesn’t have to be perfect. Even a small desk in a quiet corner can serve as your creative haven. The goal is to create a space where you want to be, feel comfortable, and are inspired to create every day.
Grab your paints, pencils, tablets, or clay, and start building your perfect home art studio. Your creativity deserves a home of its own.