DIY Dermaplaning: How To Dermaplane At Home
If you’ve ever wondered how to achieve smooth, radiant, and soft skin without spending a fortune on spa treatments, dermaplaning might just be your new favorite skincare ritual. Dermaplaning is a safe, effective, and surprisingly simple way to remove dead skin cells and fine facial hair, giving your complexion a fresh, glowing look. And yes, you can do it at home with the right tools, technique, and preparation.
In this guide, we’ll cover everything you need to know about DIY dermaplaning:
-
What dermaplaning is and its benefits
-
Tools you’ll need
-
Step-by-step instructions for safe at-home dermaplaning
-
How often to dermaplane
-
Common mistakes and precautions
-
Post-dermaplaning care
-
Product recommendations and tips
What is Dermaplaning?
Dermaplaning is a manual exfoliation technique that removes the top layer of dead skin cells and fine vellus hair, often called peach fuzz. Unlike chemical exfoliants or harsh scrubs, dermaplaning gently resurfaces your skin with a small, sterile blade.
Key Benefits
-
Smooths Skin Texture
-
Removes dead skin cells and peach fuzz
-
Makes your skin feel soft and look polished
-
-
Enhances Product Absorption
-
Skincare products penetrate deeper after removing the surface layer
-
Serums, moisturizers, and masks become more effective
-
-
Improves Makeup Application
-
Foundation glides on smoothly without clinging to peach fuzz
-
Creates a natural, airbrushed effect
-
-
Brightens the Complexion
-
Exfoliating dead skin cells reveals fresher, healthier-looking skin
-
Helps minimize dullness
-
-
Can Reduce Appearance of Fine Lines
-
Regular dermaplaning encourages smoother skin and softer texture
-
Not a replacement for anti-aging treatments but complements them
-
Tools You’ll Need for At-Home Dermaplaning
You don’t need an expensive spa setup. The right tools are simple, and using high-quality, sterile equipment is key to avoiding irritation or injury.
1. Dermaplaning Tool or Surgical-Grade Blade
-
Dermaplaning Razor: Specifically designed for home use with a safety edge
-
Single-Edge Sterile Blade (10–15 degrees): The classic choice for experienced users
-
Do NOT use regular razors or multipurpose blades: They are unsafe for the delicate facial skin
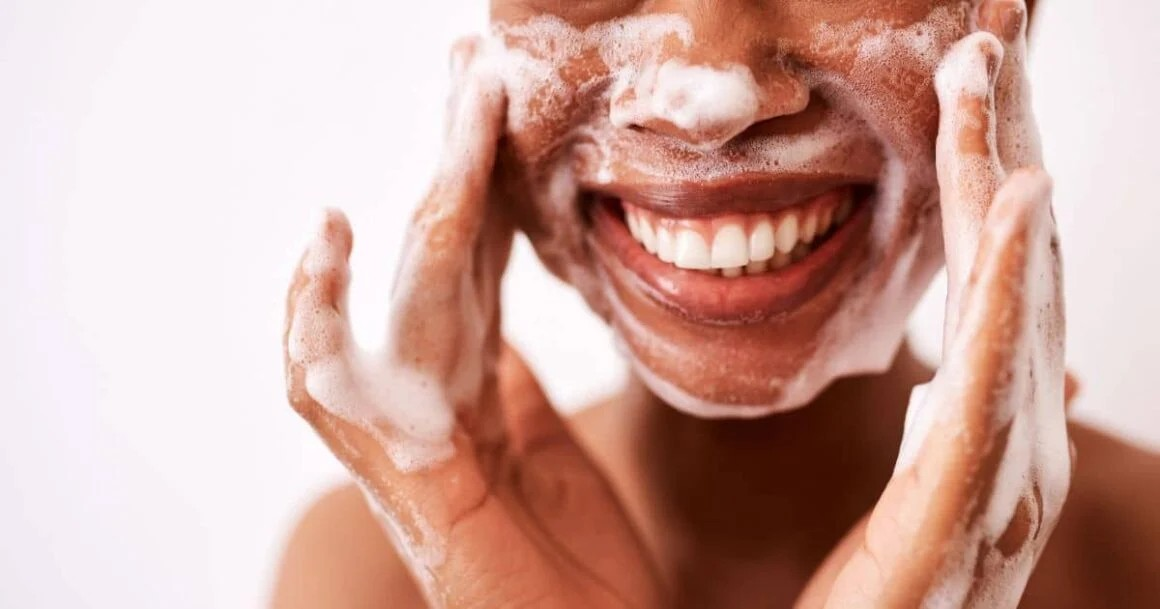
2. Cleanser
-
Use a gentle facial cleanser to remove makeup, oil, and impurities before dermaplaning
-
Avoid foaming cleansers with harsh sulfates that may dry out skin
3. Toner or Antiseptic
-
Optional, but using a gentle toner or antiseptic solution can help sanitize the skin and prevent breakouts
4. Facial Oil or Moisturizer
-
Apply after dermaplaning to nourish and soothe skin
-
Hyaluronic acid or peptide-rich moisturizers are excellent choices
5. Soft Towels and Good Lighting
-
Clear, well-lit space ensures precision and safety
-
Soft towels help pat your skin dry without irritation
Step-by-Step Guide to Dermaplane at Home
Follow these steps carefully to ensure a safe, effective, and smooth dermaplaning experience:
Step 1: Prep Your Skin
-
Wash your face thoroughly
-
Remove makeup, oil, and dirt using a gentle cleanser
-
Dry completely with a clean, soft towel
-
-
Optional: Apply a gentle toner
-
Helps balance the skin’s pH
-
Sanitizes the surface for extra protection
-
-
Tie back hair
-
Make sure hair is away from your face to avoid accidents
-
Step 2: Choose Your Tool
-
Hold your dermaplaning tool or blade at a 45-degree angle to your skin
-
This angle ensures you remove dead skin and peach fuzz without nicking the skin
Step 3: Begin Dermaplaning
-
Start with one side of your face
-
Begin at the jawline or chin
-
Hold the skin taut with your free hand to create a smooth surface
-
-
Use short, gentle strokes
-
Move the blade upward and outward
-
Never press too hard; light pressure is enough
-
-
Move to the cheeks, forehead, and nose
-
Avoid delicate areas directly under the eyes
-
Skip areas with active acne, cuts, or irritation
-
-
Focus on small sections at a time
-
Avoid trying to cover the entire face in one stroke
-
-
Pay attention to blade cleanliness
-
If the blade gets clogged with hair or skin, wipe it with a tissue
-
Replace the blade regularly to maintain hygiene and effectiveness
-
Step 4: After Dermaplaning
-
Rinse face with cool water
-
Removes any loose skin cells or hair
-
-
Apply a soothing serum or moisturizer
-
Hyaluronic acid or aloe-based products help hydrate and calm skin
-
-
Optional: Apply SPF
-
Skin is more sensitive to UV after dermaplaning
-
Use broad-spectrum SPF 30+ if you will be outside
-
How Often Should You Dermaplane?
-
Every 3–4 weeks is generally safe for most skin types
-
Over-dermaplaning can cause irritation or redness
-
Adjust frequency based on hair growth, skin sensitivity, and exfoliation needs
Common Mistakes to Avoid
-
Using the wrong blade
-
Always use a dermaplaning-specific blade; regular razors can cut or scar the skin
-
-
Dermaplaning over active acne
-
Can worsen inflammation or spread bacteria
-
-
Using too much pressure
-
Skin is delicate; light strokes are sufficient
-
-
Skipping SPF
-
Dermaplaning removes the top skin layer, making it more sensitive to UV damage
-
-
Ignoring tool hygiene
-
Always sanitize your tool before and after use
-
Targeted Tips for Best Results
-
Do Dermaplaning on Dry Skin
-
Wet skin can cause the blade to slip
-
-
Hold Skin Taut
-
Helps prevent nicks and allows for smooth strokes
-
-
Small Sections at a Time
-
Avoid large sweeping motions, especially around nose and jawline
-
-
Avoid Active Breakouts
-
Skip inflamed areas to prevent irritation or infection
-
-
Finish with Nourishing Products
-
Moisturizers, serums, or oils help protect and repair the skin after dermaplaning
-
Benefits of Regular At-Home Dermaplaning
-
Smoother Makeup Application
-
Foundation, powders, and blush glide on more evenly
-
-
Brighter, Healthier Skin
-
Regular removal of dead skin cells keeps the complexion fresh
-
-
Minimized Appearance of Fine Lines
-
Exfoliation can soften the look of fine lines over time
-
-
Improved Skincare Absorption
-
Serums and moisturizers penetrate more effectively
-
-
Gentle Hair Removal
-
Fine peach fuzz is removed without pain
-
Post-Dermaplaning Care
-
Avoid Exfoliating Products for 48 Hours
-
AHAs, BHAs, and scrubs may irritate freshly exfoliated skin
-
-
Use Gentle, Hydrating Products
-
Avoid harsh chemicals; focus on hydration and repair
-
-
Sun Protection
-
Dermaplaned skin is more sensitive to UV damage; SPF is non-negotiable
-
-
Avoid Makeup for 24 Hours (Optional)
-
Allows the skin to breathe and recover
-
Recommended Products for Dermaplaned Skin
-
Moisturizers:
-
CeraVe Moisturizing Cream
-
Neutrogena Hydro Boost Gel-Cream
-
-
Serums:
-
Hyaluronic Acid serum for hydration
-
Vitamin C serum for brightening
-
-
Soothing Oils:
-
Squalane or jojoba oil for added moisture
-
-
Sunscreen:
-
Broad-spectrum SPF 30+ to protect sensitive skin
-
Precautions and Safety
While dermaplaning is generally safe, certain people should avoid DIY dermaplaning:
-
Active acne or rosacea
-
Sensitive or easily irritated skin
-
Those prone to keloids or scarring
-
Recent chemical peels or laser treatments
If in doubt, consult a dermatologist or licensed esthetician before starting at-home dermaplaning.
DIY dermaplaning is a game-changer for achieving soft, smooth, radiant skin at home. It’s simple, cost-effective, and can be incorporated into your skincare routine safely if done correctly. By following these steps:
-
Prepping your skin
-
Using the right tools
-
Applying proper technique
-
Caring for skin afterward
…you can enhance skin texture, brightness, and product absorption, all while removing peach fuzz for a naturally polished look.
Remember, consistency is key. Done once every 3–4 weeks with care and attention, dermaplaning can become a luxurious self-care ritual that helps your skin look and feel its best.
Advanced Tips for Safe and Effective Dermaplaning at Home
Dermaplaning is straightforward once you understand the technique, but there are several advanced tips that can make your results smoother, safer, and longer-lasting.
1. Choose the Right Blade for Your Experience Level
If you’re a beginner, safety is key:
-
Beginner: Use a dermaplaning razor designed for at-home use. These often have a safety guard to prevent nicks.
-
Intermediate: Single-edge sterile blades give more precision but require steady hands.
-
Advanced: Some experienced users combine dermaplaning with chemical exfoliation, but this requires caution and patch testing.
Tip: Replace blades regularly. A dull blade increases the risk of cuts and won’t remove hair or dead skin effectively.
2. Hold the Blade Correctly
The angle at which you hold the blade is critical:
-
45-degree angle is recommended for most facial areas.
-
Avoid holding the blade perpendicular to the skin; this can cause scraping or irritation.
-
Keep a light grip pressure is not needed. The blade should glide over the skin.
3. Work in Small Sections
Breaking your face into sections ensures precision and control:
-
Jawline
-
Cheeks
-
Nose and upper lip
-
Forehead
Pro tip: Skip sensitive areas directly under the eyes or over any active acne. These zones are prone to irritation or cuts.
4. Stretch Your Skin
Use your free hand to gently pull the skin taut. This creates a smooth surface for the blade to glide across and reduces the chance of nicking the skin.
5. Keep a Tissue Nearby
Hair and dead skin will accumulate on your blade. Wipe it frequently to maintain sharpness and cleanliness.
6. Use Proper Lighting and a Mirror
Good visibility is essential for precision. Consider a magnifying mirror for tricky areas like the nose, chin, and upper lip.
Step-By-Step Hacks for Tricky Areas
Some areas of the face are harder to dermaplane than others. Here’s how to tackle them safely:
Upper Lip
-
Tilt your head slightly back.
-
Hold the skin taut above the lip.
-
Use short, upward strokes, avoiding downward scraping.
Nose
-
Gently stretch the skin along the sides of the nose.
-
Use very light pressure. Avoid the tip, which is sensitive.
Chin
-
Stretch the skin downward.
-
Follow natural contours for safe hair and dead skin removal.
Forehead
-
Work in horizontal sections, starting from your hairline down.
-
Stretch the skin upwards to smooth ridges.
How Often Should You Dermaplane?
Frequency depends on your skin type and hair growth:
-
Normal skin: Every 3–4 weeks
-
Oily skin: 3–4 weeks is still safe
-
Dry or sensitive skin: Every 4–6 weeks to avoid irritation
-
Hair growth rate: Faster growth may require slightly more frequent sessions
Tip: Over-dermaplaning can cause irritation and breakouts. Stick to a schedule and monitor how your skin responds.
Troubleshooting Common Issues
Even with careful technique, issues can arise. Here’s how to troubleshoot them:
1. Redness or Irritation
-
Use gentle, hydrating products post-dermaplaning
-
Avoid scrubs, retinoids, or acids for 48 hours
2. Small Nicks
-
Apply antiseptic or healing ointment to prevent infection
-
Avoid scratching or picking at the area
3. Missed Hair or Rough Patches
-
Go over these areas gently, holding the skin taut
-
Ensure the blade is sharp and clean
4. Breakouts
-
Avoid dermaplaning directly over active acne
-
Use a gentle antibacterial cleanser afterward if prone to breakouts
Post-Dermaplaning Care: The Most Important Step
Dermaplaned skin is fresh, smooth, and sensitive, so post-care is crucial:
-
Cleanse gently with lukewarm water
-
Apply hydrating serum like hyaluronic acid or peptides
-
Moisturize with a soothing cream or oil
-
Apply SPF 30+ if exposed to sunlight
-
Avoid makeup for 24 hours if possible to allow the skin to breathe
Tip: If your skin feels tight, add a layer of squalane or jojoba oil to lock in hydration.
Product Recommendations for At-Home Dermaplaning
Here are some products that pair well with dermaplaning for hydration, repair, and protection:
-
Moisturizers: CeraVe Moisturizing Cream, Neutrogena Hydro Boost Gel-Cream
-
Serums: The Ordinary Hyaluronic Acid 2% + B5, Paula’s Choice Peptide Booster
-
Oils: Squalane oil, Jojoba oil
-
SPF: La Roche-Posay Anthelios SPF 50, EltaMD UV Daily SPF 40
Seasonal Adjustments
Dermaplaning can be adapted for different climates and seasons:
Winter
-
Skin is drier, so use a richer moisturizer
-
Limit exfoliation to once every 4–5 weeks if dryness is severe
-
Add a facial oil to seal in moisture
Summer
-
Lightweight gel-based moisturizers are preferable
-
Always apply sunscreen after dermaplaning, especially for sun-exposed areas
Transitional Seasons
-
Adjust based on skin response
-
If your skin becomes dry or rough, use a richer lotion for hydration
-
If skin is oily, stick to gel-creams or lightweight hydrators
Integrating Dermaplaning Into Your Skincare Routine
Dermaplaning works best when it’s part of a holistic routine:
-
Cleanse daily with a gentle face wash
-
Exfoliate lightly with dermaplaning or chemical exfoliants (alternate days)
-
Hydrate with serums and moisturizers
-
Protect with sunscreen every day
-
Target concerns like pigmentation, fine lines, or dryness with serums and treatments
Tip: Dermaplaning enhances absorption of active ingredients, so applying serums immediately afterward gives maximum benefit.
Lifestyle Tips for Optimal Results
Healthy habits amplify the effects of dermaplaning:
-
Stay hydrated: Water-rich foods and drinks help maintain skin plumpness
-
Balanced diet: Omega-3 fatty acids, antioxidants, and protein support skin repair
-
Sleep: 7–9 hours helps your skin rejuvenate naturally
-
Avoid smoking and excessive alcohol: Both accelerate aging
-
Manage stress: Stress affects hormones and can make skin more reactive
Alternative At-Home Tools
If you’re nervous about using a blade, there are alternatives:
-
Dermaplaning gloves: Gentle exfoliating gloves that remove dead skin without a blade
-
Soft facial exfoliating brushes: Can mimic some benefits of dermaplaning for sensitive skin
-
Chemical exfoliating pads: Mild AHAs or BHAs provide gentle resurfacing
These are less precise than a blade but safer for beginners or sensitive skin types.
My Personal Experience With DIY Dermaplaning
After integrating dermaplaning into my routine:
-
Makeup goes on smoother and lasts longer
-
Skin feels silky and soft, especially on the cheeks and jawline
-
Serums absorb more effectively and show visible results
-
Peach fuzz is gone, creating a natural, airbrushed look
Consistency is key. I dermaplane once every 3–4 weeks, followed by hydration and SPF, and my skin never feels irritated.
Final Thoughts
DIY dermaplaning at home is a safe, effective, and inexpensive way to achieve smooth, radiant skin. With the right tools, proper technique, and post-care, anyone can enjoy glowy, soft, and refreshed skin without visiting a spa.
Key takeaways:
-
Use a sterile dermaplaning blade or safe at-home tool
-
Prep and cleanse your skin thoroughly
-
Work in small sections with light pressure
-
Stretch skin for safety and precision
-
Follow with hydration and SPF
-
Avoid over-exfoliation and sensitive areas
Dermaplaning is more than a beauty hack it’s a self-care ritual that leaves your skin looking polished, radiant, and youthful. Done properly, it enhances every part of your skincare routine, making products work better and makeup apply flawlessly.